From this window you can add a payment plan to a student's account. This window is accessed from the Self-Service Payment Plans window, when you enter a student ID number and click the Add Plan button. Example
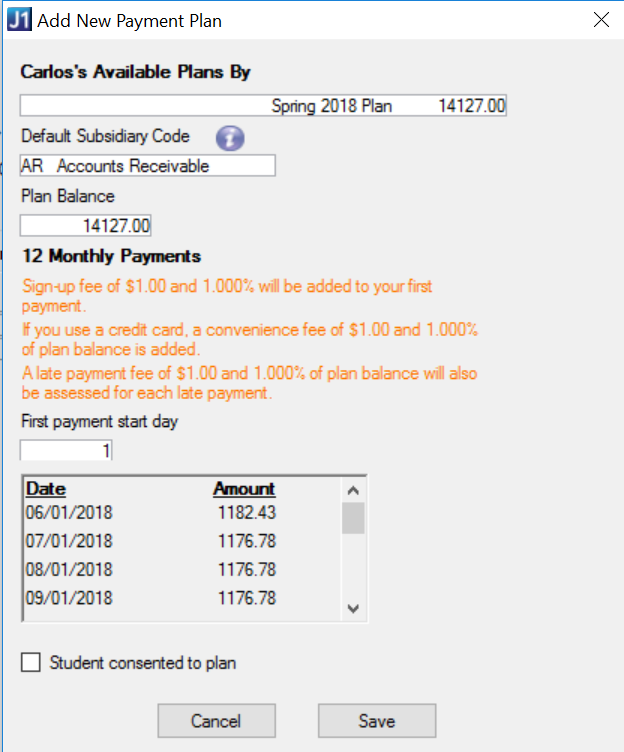
Choose a payment plan from the drop-down.
If you want to associate a subsidiary code to the plan, choose one from the drop-down options.
 |
You can only tie Receivable type subsidiaries to a payment plan, so the drop-down will show the available subsidiaries. |
The balance will automatically populate, but you can edit the plan's starting balance if needed.
If there are any fees associated with the payment plan, you will see a message listing any dollar amounts and/or percentages after the number of monthly payments.
Enter a day of the month when the payment is due.
Review plan payments and due dates.
If you are working with the student, and the student has consented to the plan, select the Student consented to plan checkbox.
Click Save.